Tag Archives: Julia Child

The News From France: Gratin de Quennelles de Poisson

Fish quenelles, or more specifically quenelles gratinéed in white wine sauce is a standard luncheon dish served across France, but most notably at the cafes and bistros of Paris. The delicate, saline quality of the white fish (traditionally Pike) is extracted and extrapolated upon with the influence of black truffles, pepper, butter, cream, and gruyere.

The richness of the dish sheds light on why the French are notorious for their small portions, but the richness of the dish sheds absolutely no light on their small proportions (which they are equally notorious for). How a culture can turn heavy cream, decadent amounts of butter, and every form of fat and sugar available into something consistently light and refreshing is beyond the scope of science to explain. All I can say is this dish will make you sublimely happy and will transform a few sad little cans of tuna sitting in the back of your cupboard into an entrée worthy of ironing a tablecloth for. Chill your most mineral-rich dry white wine and loosen your belt just a notch. Bon appétit!

Ingredients

For the quenelles:

Coarse kosher salt

Ground white pepper

4 tablespoons of butter

3/4 cup flour

2 large eggs

1 1/4 pounds well-chilled skinless lean white fish, drained well if taken from a can

1-8 tablespoons of heavy cream

2 tablespoons of chopped black truffle

For the sauce and the Gratiné

5 tablespoons of butter

7 tablespoons of flour

1 1/2 cups simmering whole milk

1 1/2 cup simmering white wine fish stock, or a combination of equal parts white wine, dry vermouth, and the juice from tuna cans, clam juice, or something of the like combined with a clove of garlic, two slices of lemon, chopped shallot or white onion, salt, pepper, and butter

Kosher salt

ground white pepper

Approximately 1 cup of heavy whipping cream

the juice of two lemons

Approximately 3 tablespoons of grated Gruyère cheese

1 tablespoon of butter cut into pea-sized dots

Preparation

1. Prepare the pâte à choux

Measure out 4 tablespoons of butter. I am using this very nice French butter as a sort of experiment to see if using a local butter relative to the dish I'm preparing has any effect on the final product...here's a clue: it totally does.

Measure out the flour by scooping the flour into the measuring cup then...

...Level off with the flat surface of a butter knife

Bring the butter to a simmer with one cup of water over medium heat

remove the pan from the heat

Add the flour all at once...

...mix thoroughly off the heat. Add the eggs one at a time and...

...continue to beat vigorously until well combined off the heat.

place the saucepan into a bowl of ice water and continue to stir for about four minutes until well-chilled.

Chill the pâte à choux in the refrigerator until ready to use.

2. Prepare the fish to be puréed

Thoroughly drain the juice from each can of tuna into a receptacle and reserve for use as a substitute for white wine fish stock
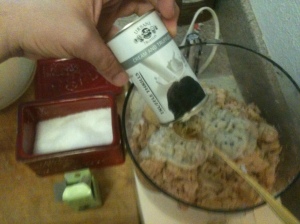
Place the very dry white fish in a food processor

Add the cream, truffles, white pepper, and kosher salt. If you don't have whole black truffles on hand (if you do I'll be surprised, impressed, and will probably want to be your friend) Whole Foods has a nice, relatively inexpensive alternative in the form of black truffle shavings in cream. It's $13.00 per can but when you compare it to the hundreds you would spend on whole truffles it's a steal and since the recipe calls for cream as it is your can replace a portion of the cream called for with the cream in the container and supplement it with extra cream as necessary.

Add the chilled pâte à choux to the ingredients in the food processor and...

Process for about a minute or until smooth

test a spoonful in a pot of lightly simmering water. Simmer for a minute or two, taste, and take note of what is missing texture and flavor-wise.

If the mixture feels too dense add a little more cream, but it is far better to have too little cream versus having too much cream when it comes time to form your quenelles. Adjust the seasoning by adding more salt or white pepper. The key is to have the spices extract the flavor of the truffles without overpowering them.

Transfer to a metal bowl and chill in the refrigerator until ready to use.

3. Prepare the sauce

Crush the clove of garlic with the flat side of your standard 10-12-inch French knife

Combine equal parts white wine, dry vermouth, and drained tuna water with the crushed clove of garlic, two slices of lemon, white pepper and salt to taste, and about three tablespoons of butter. Transfer to a medium saucepan over high heat

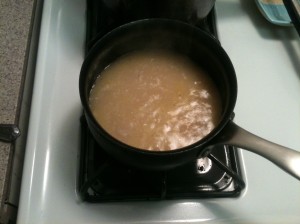
Bring to a high simmer and reduce demi sec (by half)

Meanwhile juice 2-3 lemons...

...strain through a fine mesh seive

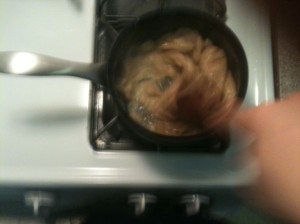
Prepare a blonde roux by combining the butter and flour over medium heat. Take care not to color the roux. My example is dark brown because in a feeble attempt to make this dish "healthy" I used whole-grain whole-wheat flour.

Off the heat add 1 1/2 cups of the reduced white wine fish stock replacement. Mix until combined.

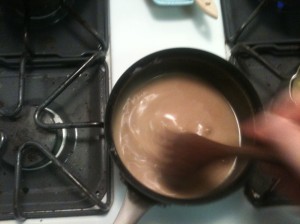
Add the simmering milk

Cook over medium heat for 1-2 minutes until thickened

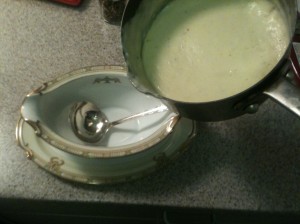
Thin out with the heavy cream (oxymoron, I know)

Season to taste with lemon juice, white pepper, and kosher salt. Set aside.

4. Prepare the quenelles

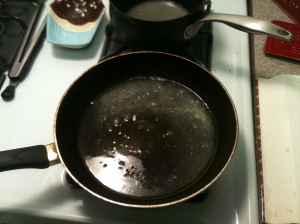
Over low/medium-low heat bring half fish stock replacement and half salted water to a very, very low simmer
Fill and oven-safe and fire-proof dish with 1.4 inch of the sauce, set aside

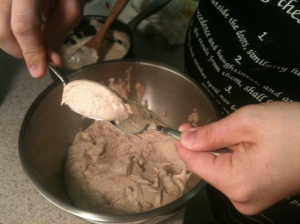
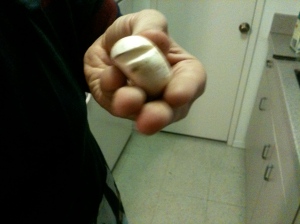
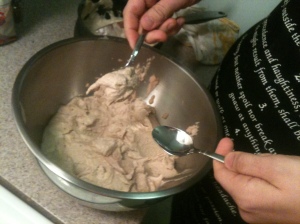
To prepare the fish quenelles take two teaspoons in your hands and fill one slightly with the fish purée

To prepare the fish quenelles take two teaspoons in your hands and fill one slightly with the fish purée

Turn the mixture over forming one clean side, then...

...form a second clean side...

...then ...finish by forming a football-like-shaped three-sided quenelle.

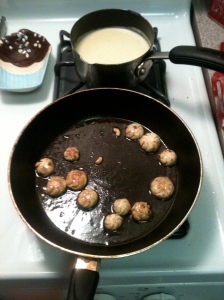
invert one of the spoons and gently drop the quenelles into the lightly simmering poaching liquid.

Poach the quenelles for about 20 minutes, take care that the poaching liquid remains just below a simmer. If the simmer gets too vigorous the quenelles will break apart and dissolve

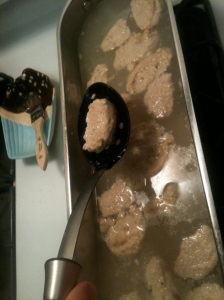
Gently remove the quenelles from the poaching pan with a slotted spoon and...

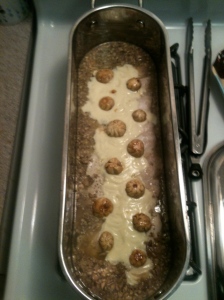
...lay in a fanned-out circular design on top of the 1/4-inch of sauce in your prepared dish

The layout of the quenelles should be tight and visually appealing, in a design appropriate to the relative shape of your pan. THis dish will be served in-pan at the table.

Brush the rest of the sauce over the quenelles in the pan

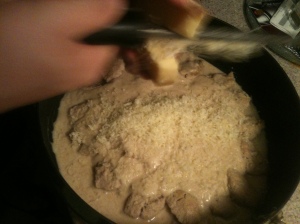
grate a generous amount of gruyère over the entire dish

Move the pan into a pre-heated broiler and gratin for 15-20 minutes or until the dish is a deep golden brown...

...like so. The top will be crispy and the mass will be bubbling, hot, and highly aromatic

Serve with a tasty, complimentary contrasting vegetable, a starch like rice pilaf, a nice, crusty French baguette if you have one, and a dry, mineraly French white wine

Leave a comment

Filed under The News From France

Dinner in Havana: Colombo (Shrimp and Coconut Curry with Sweet Potato Fries)

Dig in!

It’s a hot night, very hot. The balmy air is heavy and the sweat seeps through your linen suit. A music somehow hotter than the night emmenates from a little restaurant and the rhythms make you feel suddenly cooler. You settle in and the pretty woman behind the bar sets a little bowl of shrimp in front of you accompanied by some sweet potato fries. The aroma is musky like curry and smells sweet like coconut. The fries smell savory and substantial. You take a bite and the sharp bite of the pepper and the sublimely cool shrimps circulate in your mouth as the warm spices soften the edges. You take a bite of the fries and its like curling your toes into the rich soil. The endorphins rush and suddenly you’re one with the music, the night, the island.

Colombo summons up something dark and ancient. Something which came about through the confluence of the spices on traders’ ships, the bounty of the crystal-blue waters, and the produce of the islands themselves. It is unlike anything you’ve ever had, and on a night just hot enough to conjur up whatever means Havana to you the combination of this simple curry, the crisp sweet potato fries, and a perfectly chilled mojito has magically transformative properties. You’ve been warned. Enjoy.

Ingredients

2 sweet potatoes

canola oil

2 pounds of shrimp

2 cloves of garlic

1 red bell pepper

1 scotch bonnet chile, or one habanero chile if a scotch bonnet is unavailable

1 tablespoon of mild curry powder

2 cups of coconut milk

1 small bunch of cilantro

salt and pepper

1/4 cup olive oil

1. Begin by peeling and deveining the shrimps

First take the whole shrimp, in-peel, into both hands

gently pull the tail off

then pull off the rest of the peel

check the shrimp to make sure all of the peel has been removed

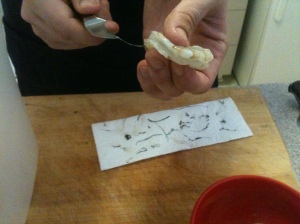
with a paring knife (or a bird's beak knife as I'm using here, if you have one) cut a slit along the length of the back of the shrimp

pull the vein out with the tip of your knife. For those unfamiliar with this process the "vein" is actually the shrimp's digestive track and the vein itself actually contains the shrimp's feces. An empty vein is an indicator that the shrimp was not fed properly before being harvested, a full vein is a sign of the good health and good farming practices of the shrimp producer.

Clean your knife off on a paper towel. You don't want shrimp refuse on your porous cutting surface.

Turn the shrimp over and cut another slit along the length of the inside of the shrimp. There is another major vein in this side to remove.

Pull the second vein out and discard on your paper towel as you did with the first vein.

As you work retain your shrimps in a bowl and keep chilled in the refrigerator (you'll need to serve the curry immediately after cooking). Reserve the shrimp peels in a storage container and keep in the freezer for a later use. Shrimp tails are used in an infinite number of dishes, namely shrimp bisque, which I will demonstrate in a later post.

2. Prepare the sweet potatoes for frying.

Peel both sweet potatoes, taking care to remove all signs of peel

True the edge of your knife with a steel by holding the knife at a 10-12 degree angle and running the edge of the knife against the steel alternately about 5 times each side for a total of 10 strokes. This process does not sharpen the knife but removes small inconsistencies in the sharpened edge and makes for safer, more accurate cutting. For the purpose of cutting starchy vegetables a Santoku knife is the ideal took, the thin, very sharp blade lends greater accuracy in cutting. If you do not own one a standard 10-12 inch French knife works perfectly well.

Begin by cutting the sweet potato into 3 to 3 1/2-inch segments

Taking care to tuck your fingertips and thumb in begin trimming the edges of the 3 to 3 1/2 inch segments into rectangles with sharp 90-degree angles

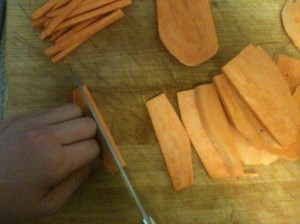
From your larger rectangles cut smaller, 1/4-inch thick rectangles. Be vigilant about keeping all angles at a tight 90-degree angle. This will be difficult at first but in time you will gain easy precision and easy precision is the hallmark of any good cook and definitely any professional chef.

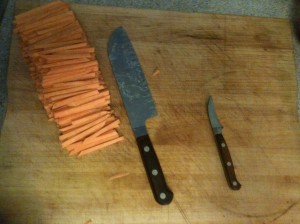
From the 1/4-inch thick rectangles cut 1/4-inch by 1/4-inch by 3 - 3 1/2-inch sticks. This is a classical cut known as the "batonnet" and it is typically used to make pommes frites (french fried potatoes)

Fabricate all of your sweet potato into perfect batonnets, like so, and set aside.

3. Prepare the rest of the vegetables

Mince the garlic by first crushing each clove with the face of your knife and your fist

Remove and discard the garlic peel from the crushed garlic cloves

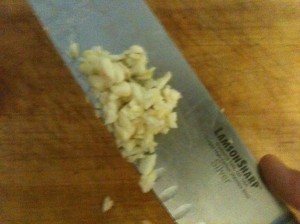
Chop the garlic finely by first slicing the crushed cloves, regathering the sliced crushed garlic, and running the knife rapidly over the garlic over and over again until...

...it looks like this. Set aside.

Slice the top and bottom of the red bell pepper off and remove the pulpy inside and seeds. Discard the tip and tail as well as the pulpy interior and seeds, reserve the rest.

Slice the bell pepper into 1/8-inch thick slices as for the julienne (see back to basics post)

Cut the 1/8-inch slices into 1/8-inch by 1/8-inch by 1/8-inch cubes, the "brunoise" from my back-to-basics post. Brunoise all of the bell pepper and set aside.

Fabricate the Scotch Bonnet or Habanero pepper in the same fashion as the bell pepper. Wear latex gloves while doing this, the pepper's oil will burn you badly and will hurt for hours if you have any little nicks or cuts in your skin.

Rinse and dry your cilantro with paper towels. Begin by slicing the mass into thin slices, regather the mass and run your knife over it rapidly until...

...the entire mass of cilantro is finely diced like so. Set aside with the rest of the vegetables.

4. When you’re ready to eat begin by preparing the Sweet Potato Fries.

Toss the batonnet of sweet potato with kosher salt and freshly cracked black pepper in a bowl.

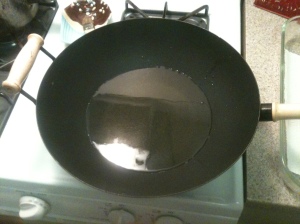
Preheat oven to 200 degrees farenheit, heat a few cups of oil in a pan over high heat. I use a wok on account of its effective conduction of heat, but any sort of pan will work. The key is to get the oil very, very hot (just barely under smoking) before adding the batonnet of sweet potato. Very hot oil will seal in the moisture and make a crisp outside while under-heater oil will quickly absorb into the sweet potato and make a limp, sad, little monstrosity out of what should be a crisp and tasty fry.

When the oil is hot enough add the batonnet of sweet potato a little at a time.

Fry each batch until golden, about 2-3 minutes depending upon the size of the batch

As each batch of fries finishes transfer to a large pan in the 200-degree oven outfitted with several paper towels to absorb the extra oil. The fries will only stay crisp if there are paper towels to absorb the extra oil and moisture in the dry, hot oven. Repeat process until all the batonnet of sweet potato are turned into delicious sweet potato fries

5. Prepare the curry

Over medium-high heat heat the olive oil to just under smoking

Add the prepared shrimps

Add the habanero, bell pepper, and garlic

Saute together for about 4-5 minutes over medium-high heat

Add the curry powder and saute for another minute

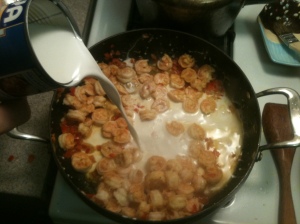
Turn the heat up to high and add the coconut milk. Stir constantly over the course of about 10 minutes or until the sauce has reduced to a thickened, sauce-like consistency

After 5 minutes it should look like this...

After 10 minutes it should look like this. It is ready to serve at this point.

6. Plate and serve

After the curry is ready toss the hot french fries with kosher salt and freshly cracked black pepper to taste.

I plated the curry in bowls set on top of a dinner plate with the sweet potato fries served on it.

Sprinkle a generous amount of the chopped cilantro on top. Mix yourself a third mojito and you're in business! Enjoy!

1 Comment

Filed under Foods of the World

The News From France: Sole Bonne Femme

I can scarcely think of a dish which is a more representative example of French cuisine as a whole. Simple, superior ingredients are prepared in such a way so as to respect the true flavors of the individual elements while bringing them together for a two-part experience. You first experience the subtle briny flavor of the fillets of sole, the silky richness of the sauce, and the earthiness of the mushrooms individually. As the flavors infuse in your mouth you suddenly find yourself in the midst of an elevated experience…the silkiness of the sauce somehow simultaneously highlights the briny character of the sole while mellowing it into buttery goodness and the earthiness of the mushrooms cuts through that flavor dichotomy to make a rounded, balanced ringing in your mouth as you savor.

Sole Bonne Femme shows us the heart of what us Francophile epicureans call “La Belle Cuisine” (which is to say French cuisine as a whole) is not a dead and lofty set of rules for preparing expensive, high-brow chow. French cooking is a living, breathing, highly accessible art form. None of the ingredients called for in this dish are especially expensive, in fact I believe I spent less than $20 for everything. None of the preparation techniques are beyond the scope of even the most novice home cook. All that is needed is the time to taste the sauce, your own intuition to adjust the seasoning, the care to gently handle the delicate fillets, and the soulfulness to invest an hour or so to create something truly delicious that you can share with the person or people that you love. It’s no wonder the French named this dish literally “Good Woman Fish,” for if a woman has indeed prepared this dish for you she is worthy of the name and you can consider yourself fortunate to receive the pure part of herself she invested in serving it to you.

Ingredients

For the Poached Fillets of Sole

3/4 pound or 3 1/2 cups fresh mushrooms, cleaned

4 tablespoon butter

freshly cracked peppercorns

a pinch of salt

2 1/2 pounds fillets of sole

1 shallot

1 bottle dry white wine

2 cups of dry vermouth

1/2 cup of clam juice

For the Sauce

3 Tablespoons of butter

4 Tablespoons of flour

1 cup of reduced liquid prepared for poaching the fillets of sole and reserved for the sauce

3/4 cup whole milk

2 egg yolks

1/2 cup whipping cream

1-2 lemons

4-8 additional butter

For the Mushroom Garniture

8-10 whole, medium-small white button mushrooms, stems removed and thoroughly cleaned

salt

1 lemon

1 Tablespoon of butter

Directions

1. Poach the fillets of sole.

Begin by thoroughly washing your mushrooms, once washed carefully brush them with a very clean towel to remove all dirt and impurities

Slice all of the mushrooms thinly with a standard 10 to 12-inch French knife, stems included. Slicing the mushrooms first makes it far easier to uniformly chop them in the next step.

Roughly chop the sliced mushrooms by rapidly running the French knife back and forth across your pile of mushrooms.

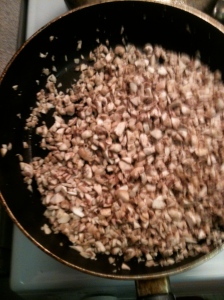
The mushrooms are ready when they look like this.

Heat a generous tablespoon of butter in a sauté pan until just after the bubbles subside.

Sauté the chopped mushrooms in the hot butter for about 3-5 minutes. They should not brown. They will look like this when they are ready. Season with a pinch of salt and a couple of grinds of fresh black pepper. Set aside.

Once the mushrooms are ready and waiting lay out your fillets of sole. You will notice that there is a milky, smooth side, and a darker, less milky side. Here I have pictured the fillets with the milky side up and I have turned one over to the darker side to demonstrate. You will be serving these with the prettier, milky side up so bear this in mind as we progress.

Season each side with salt and freshly cracked black pepper. Be gentle when handling the fillets, they are fairly delicate and with fish especially it's most appealing to serve complete, undamaged pieces to demonstrate quality.

Once the fillets are seasoned you're going to transfer the prepared chopped mushrooms into a fireproof, oven-safe dish that you are comfortable serving from at the table. I used my fish poaching pan, an enameled pan such as a Le Creuset (for those fortunate enough to own one) or something of the like will work well.

Evenly spread the mushrooms over the entire surface of the bottom. The mushrooms are going to keep the fillets of sole from touching the bottom of the pan and will keep them tender and moist so be sure no large parts of the bottom are left exposed.

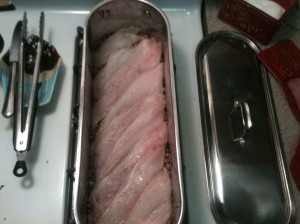
Gently lay the fillets of sole on top of the mushrooms in the pan milky-side up, you may gently overlap the pieces as I have so that they all fit. Place in the refrigerator to keep chilled as you prepare the poaching liquid.

Peel the shallot, cut off the dirty non-root tip. Cut several small slices into the shallot lengthwise with the grain as I have with out actually cutting the pieces off of the root end.

Turn your knife and carefully cut one horizontal slice in the same direction as the lengthwise slices, this helps you get smaller shallot pieces in the next step.

Carefully cut several cross-wise slices over the lengthwise slices so that you end up with a very small mince of shallot. Mince the entire shallot in this fashion.

Combine the shallot, bottle of white wine, two cups of dry vermouth, 1/2 cup clam juice, salt, pepper and about 3 tablespoons of butter.

Bring to a healthy simmer over medium-high heat and reduce the poaching liquid by half. This condenses the flavors, cooks off the alcohol, and tames the harshness of the vermouth. While the liquid reduces pre-heat the oven to 375 degrees F.

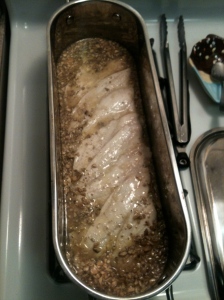
Once the liquid has reduced pour it into the poaching pan over the fillets and mushrooms taking care not to disturb or damage either.

Cover the liquid, sole, and mushrooms with parchment. Make sure the parchment is completely pressed against the water. This prevents moisture from escaping and keeps the fillets completely submerged in the poaching liquid...which prevents them from drying out.

Over the lowest possible flame bring the fillets, mushrooms, and liquid up to a very gentle simmer. Periodic bubbles should barely be breaking on the surface.

Move the pan into the oven and cook for 10 minutes. Only 10 minutes! Remember the fillets are very thin and they have already been cooking in the hot liquitd. DON'T FORGET TO SET YOUR TIMER!

The Sole Bonne Femme will look like this when it is done. Keep the parchment on the fish and a cover over the pan until ready to serve.

2. While the Sole poaches prepare the sauce

Prepare a roux by combining the butter and flour over medium heat until cooked together and platinum blonde in color.

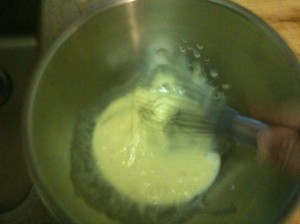
Meanwhile whip together the egg yolks and cream

Over medium-high heat add the reserved poaching liquid to the hot roux.

Add the milk and stir thoroughly

Simmer over medium-high heat for about a minute

By droplets whip the hot roux, poaching liquid, and milk mixture into the cold cream and yolk mixture. Be sure to do this slowly and keep your whip moving because if you add too much hot liquid to the egg yolks you'll end up with a rather disgusting batch of scrambled eggs instead of a tasty sauce.

Season to taste with the juice of 1-2 lemons, a few cracks of black pepper, and salt. Keep warm over a very low flame in a small saucepan until ready to serve.

3. Prepare the mushroom garniture

Flute the button mushroom caps by cutting small, diagonal slits with your paring knife first directly into the surface of the mushroom like so....

...then by cutting another cut behind the same cut at the same diagonal but pitched slightly in so that you get a small sliver of mushroom to remove.

Each slit should look like this

Remove the small sliver of mushroom

Flute around the edge of each of the mushrooms on all of the mushrooms.

Heat 1/3 cup of water, a pinch of salt, 1/2 tablespoon of lemon juice, and a tablespoon of butter in a sauté pan until hot.

Toss the mushrooms in the hot pan to completely cover them.

Cover the pan and cook over medium heat for about 5 minutes. They will look like this when ready to serve.

4. Serving

Pour the hot sauce over the hot sole in the pan

Garnish the top with the cooked fluted mushrooms

Pour the additional sauce into a sauce boat and put on the table.
1 Comment

Filed under The News From France

Inspiration for Tomorrow’s Post: Julia Child Prepares Sole Bonne Femme

The best part is when she shakes the big, dead sole in front of the camera.

1 Comment

Filed under The News From France

Reclaiming the Good Name of the Epicurean’s Proposed Schedule of Articles

For the purpose of getting business going on this site, I’m establishing the following rotation of posts and articles:

Mondays: Posts on Mondays will be dedicated to basic cooking techniques and fundamental skills, including knife skills, stocks and sauces, butchery and meat fabrication, etcetera. I’m proposing the name “Back to Basics” for this category.

Tuesdays: My Tuesday posts will be focused on the foods of the world. Posts will include recipes and production of the foods of the Americas, including South and Central American countries and regional cooking from the United States, Asian cuisine, the foods of the middle east, African cooking, and the cuisines of Britain and non-France continental Europe. I’m looking for an inventive title for this category and would welcome inventive suggestions.

Wednesdays: On Wednesdays, much to the appreciation of my graduate-student partner, I’ll focus on wine, beer, and cocktails. Posts will include reviews of wines, beers, and liquors, the pairing of wine, beer, and spirits with food, and cocktail recipes. The title for this category will, inevitably, be some sort of play on “hump day.”

Thursdays: My Thursday posts will center around classical French cuisine, I will present a dish and break it down step-by-step from ingredient sourcing to fundamental technique to presentation. The title for this category will be “The News from France.”

Fridays: Fridays will be dedicated to baking and pastry. Breads, cakes, cookies, pastries, basically anything sweet. Creative title recommendations are gladly welcomed.

Saturdays: Saturday articles will be editorials of food-related art, literature, and music. I believe there is a dialogue between cuisine and culture and I strive to dedicate Saturdays to drawing those parallels. I’m sticking with the clean title of “Saturday Editorial” for this category.

Sundays: On Sundays I will provide a review of a local restaurant or marketplace. These articles will be in-depth and will provide, I hope, helpful information for my fellow epicureans. Recommendations for inventive titles for this category are gladly accepted.

The great work begins!

1 Comment

Filed under Parliamentary Procedure

The News from France: Preparing a Classical Ratatouille

The completed Ratatouille ready to be served is silky without being fatty and incredibly good served hot and fresh or served chilled the next day once the flavors have fully infused.

A Ratatouille is a simple Provençal vegetable stew made of eggplant, tomatoes, and bell peppers. It is hearty, extremely good for you, and what’s more important the stew is very, very good to eat. My preparation is based upon the classic recipe I learned at Le Cordon Bleu with some modern adaptations taken from The Gourmet Cookbook. This version of Ratatouille is light and fresh while retaining the deep, complex flavor of heavier versions. I achieve this balance by taking the time to sauté each of the vegetables individually before finally stewing them together with the rich, earthy tomato base. The result is a tapestry of flavor, with the individual character of all of the different vegetables respected while they come together to achieve a higher purpose.

Special Equipment:

A standard 10 or 12-inch French knife

A standard paring knife

A large, fireproof enamel pot or a cast-iron dutch oven.

Ingredients:

2 1/2 pounds Roma tomatoes

1 large head of garlic

20 fresh basil leaves

1 cup of fresh, flat-leaf Italian parsley

1 1/2 cups of extra virgin olive oil

coarse kosher salt

freshly cracked black pepper

2 large yellow onions

3 assorted bell peppers

4 medium zucchini

Preparation:

1. I start by peeling and chopping the tomatoes, mincing the garlic, chopping the parsley, tearing the basil leaves in half.

a.) How to properly peel tomatoes:

The following is a classical French technique for peeling tomatoes called tomato concassé. The process is fast and incredibly easy. You will need a small pot of boiling water, a stainless steel bowl of ice water, a pair of cooking tongs, and a small paring knife.

Begin by cutting a small plus sign into the non-stem end of the tomatoes with your paring knife. The cut will be approximately 1/4 inch deep and 1/4 inch by 1/4 inch.

Repeat the process for all of the tomatoes.

Using a pair of tongs submerge each of the tomatoes into boiling water for about 30 seconds.

Shock the tomatoes by moving them directly from the boiling water into an ice water bath. This stops them from cooking and loosens the skin.

The tomato skins fall off easily. Completely peel each tomato in this fashion and discard the skins.

Chop the tomatoes like so and set aside.

b.) Properly mincing garlic:

A properly trained cook has no need for an expensive garlic press or any such gadget. All that is needed is a basic 10 or 12-inch French (or Chef) knife and a cutting board. Garlic presses are cumbersome, time-wasting contraptions waste much of the garlic in each clove and worse yet rob you of much of the flavorful garlic oil this technique retains.

We begin by breaking the bead apart with our hands and throwing away as much of the papery skin as possible, retaining the cloves.Smash the garlic cloves one by one with the flat side of your knife, pull the garlic meat out of the peel and discard the peels.

Pull all of the smashed garlic into a tight mound and begin mincing. The mincing technique is done by holding your knife like so and running it rapidly of the the garlic in an up-and-down motion until the mound is reduced to a uniform mass of very finely minced garlic.

The garlic is ready when it looks like this, set aside with the tomatoes.

c.) Chopping the parsley

Cut away roughly one cup of the parsley and discard the stems.Chop the parsley in the same fashion as your minced the garlic, leaving the finished product slightly more coarse than the garlic. Set aside with the tomatoes and garlic.

d.) Tear the basil leaves in half

Select the largest, cleanest basil leaves from your bunch.Tear in half lengthwise, like so, and add to the tomatoes, parsley, and garlic.

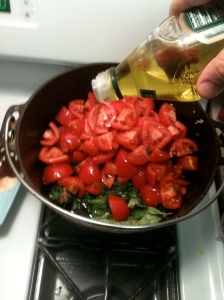
2. Combine the prepared tomatoes, garlic, parsley, basil, and about 1/2 cup of olive oil in your enamel pot or dutch oven , bring to a simmer, and simmer, covered, stirring occasionally, until tomatoes break down and sauce is slightly thickened, about 30 minutes or as long as it takes for your to prepare the rest of the ingredients in the following steps.

The fresh ingredients at the start of cooking.The tomatoes, garlic, parsley, and basil after cooking down at a low simmer for about 30 minutes.

While the sauce is simmering prepare the rest of the ingredients.

3. Begin by preparing the eggplant

Start by cutting the eggplant into approximately 1-inch by 1-inch pieces.Toss the pieces of eggplant with kosher salt and set in a colander in the sink. This process extracts extra moisture from the vegetable and prepares it for sautéing later on.

4. While the eggplant sits in the colander prepare the onions.

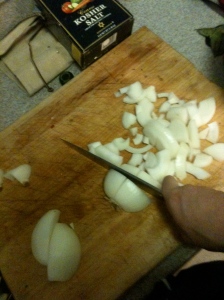
Peel the onions and cut them into approximately 1-inch by 1-inch pieces, like so.Put about 3 tablespoons of olive oil into a skillet and get it searing hot over a high flame. A proper sauté is done at very high heat, the purpose is to quickly caramelize the outside of the onion to lock in the moisture. A proper sauté is actually a relatively healthy technique because the high heat does not allow the onion to absorb the oil in the pan. Sauté the onions for about 10 minutes or until they are golden, like this. Set aside in a large bowl.

5. Prepare the bell peppers

Cut the bell peppers into approximately 1-inch by 1-inch pieces and sauté in the same fashion as the onions. Season with kosher salt and sauté for about 10 minutes or until the bell peppers are browning slightly at the edges. Pull out with a slotted spoon and put in the bowl with the onions.

6. Prepare the zucchini

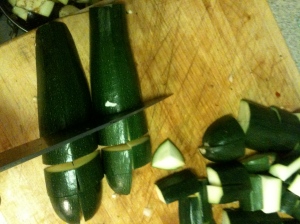
Cut the zucchini into approximately 1-inch by 1-inch pieces, like so.

.Add another 3 tablespoons of oil to your pan and sauté the zucchini in the same fashion as the bell peppers and onions, seasoning with kosher salt. Removed with a slotted spoon to the bowl of onions and bell peppers after about 10 minutes or once the zucchini turns golden brown.

7. Prepare the eggplant

Remove the eggplant from the colander and blot off any excess moisture with paper towels. The eggplant will not sauté properly if it is too moist.

Add another 3 tablespoons to your pan and sauté in the same fashion as the onion, bell pepper, and zucchini. Sauté for about 10 minutes or until the eggplant turns slightly brown around the edges, as pictured, remove from the pan with a slotted spoon and add to the bowl with your other vegetables.

8. Add the bowl of prepared vegetables to the simmering tomato base.

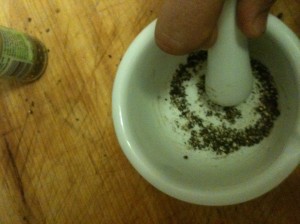
Using a mortar and pestle grind your peppercorns and kosher salt together, set aside.

Add the prepared vegetables from the bowl to the pot with the simmering tomato mixture, season with the freshly ground peppercorns and salt, and stir thoroughly to combine.

9. Simmer, covered, stirring occasionally until the vegetables are very tender, about an hour.

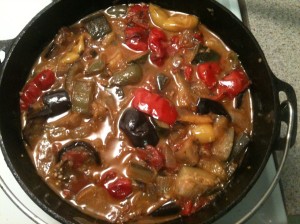
After about an hour of slowly cooking at a low simmer your ratatouille will look like this. Taste for seasoning and season with salt as necessary.

Bon Appétit! This recipe yields about 8 to 10 servings and is very good when served immediately but can be prepared up to 2 days in advance. As the stew rests in the refrigerator the flavors have more of a chance to infuse and on a hot day there is nothing nearly as refreshing to serve as this perfect, chilled  ratatouille.

2 Comments

Filed under The News From France